Archive for June 2011
summer recipes
0Wednesday, June 29, 2011 by norelle & co.
I absolutely LOVE trying out new recipes. It gets too boring eating the same ol' things day after day; that's why in this house, we like to switch things up. There are a few (well, more than a few) recipes that I am dying to try out this summer, especially since my husband will be home, and he'll be able to eat everything after we've freshly made it. He decided to put a vegetable and herb garden in our backyard, and we cannot wait until everything is ready to enjoy. Here are some recipes that I know I'll be making in the upcoming weeks and months.


.jpg)
_MG_9595-thumb-540x303-98546.jpg)


-A
tips
0Monday, June 27, 2011 by norelle & co.
Happy Monday! I promise you that I haven't given up on my two projects I have on the go; the dresser make-over and the chair make-over. It has been nice to be outside in this beautiful weather working on these projects. Now that they are both in the final stages, I have been thinking about the finishing touches. I've also been thinking about ways to make my life easier, as well as make the furniture look more professional.
For my dresser, I chose to repaint the original hardware. I tried to figure out the best way to spray paint the knobs so that they wouldn't roll around, or get stuck to the paper/sheets underneath. Then it came to me.... egg cartons!

I used an old egg carton, poked holes with a screw driver, and screwed the knobs in place on the egg carton. This made them insanely easy to spray paint, as I could get complete coverage, and wouldn't have to worry about needing to flip them over to do multiple coats.
For the chair, once I staple to fabric to the bottom of the chair, I'll need to do something to hide any little imperfections and corners that were harder to attatch. The two known methods to me are; nailtrim head vs. double welt cord. Both are easy ways to get your chair looking like it was done by a professional!

Although I haven't tried nailhead trim before, I assume it's fairly straight forward. Line up your nails, use a rubber hammer, and use plyers to trim the access nailhead (if you're using the rows of nailhead).
But that being said, I am really leaning towards double welt cord for this chair, as it was done with the original upholstery. It looks professional, but not too fancy, like the nailhead might look, for our bedroom.


Also, my last tip and new favorite product... foam rollers! They soak up paint like a sponge, don't leave little fluff marks, and take less strokes. My foam roller is about 4-inches, which can be found at Wal-Mart, Home Depot, or on the Shur Line website.

Once the dresser and chair are moved into our master suite, I'll be making the big reveal!
-A
sisterhood
0Friday, June 24, 2011 by norelle & co.
Whether you've watched the show or not, we all know if we consider ourselves a Carrie, Charlotte, Samantha or Miranda. Though Sex and the City has taught us many lessons about being single and fabulous, and married life, and we cannot forget one of the most important lessons the girls have taught us; no matter how busy your life gets, ALWAYS make time for your girlfriends.
I am so extremely lucky to have close girlfriends, whom I consider sisters. We each live very different lives, and have lived in different cities, but we've always managed to make sure we make time for one another. For us, the last Sunday of every month we have a girls breakfast, SATC style.

We gossip, reminise, tell stories, laughter, tears, share good food and each others company. I seriously don't know what I would do without my girls. We have a very special relationship and I can rely on them for anything. Life can always seem to get in the way of seeing friends, but it's important to take time out of your life to ensure that you have a little "me" time! Even if you have to schedule it in, it's worth it! If we end up seeing each other more than that once a month breakfast date, that it's an added bonus!
If you are lucky enough to live near a Milestones Grill + Bar, try and partake in their Monday Girl's Night Out! 4 Bellini's. 4 Appetizer's. $40. You cannot beat that price, especially since the cheapest appetizer is $7.49 and the Bellini's go for $6.49. I usually do not like alcohol; not beer, coolers, wine, mixed drinks...yuck!... but I love me a Bellini!

It's a "frozen blend of premium white rum, peach liqueur and sparkling white wine, topped with Boone's sangria". Doesn't that make your mouth water?! And if you're not full of Bellini's and app's and have room to share a desert, Milestones offers a "Break-up Tub" of cookie dough ice cream, double chocolate cookie and caramel... just please don't get me started on the stereotype of a name is has... :/

If you are lucky enough to have amazing girlfriends like I do, please celebrate them. Call them and ask how their week has been, or even send them an email saying that you're thinking about them. A close friendship, or sisterhood as I call it, is hard to come by, so don't let it slip through the cracks of your, up early, busy day at work, soccer game, dance practice, dinner cooking, kids to bed, filled day; your friends are ALWAYS worth the time to slow down and appreciate.
-A
Category bellini, ice cream, milestones bar + grill, sex and the city, sisterhood
down by the bay
0Wednesday, June 22, 2011 by norelle & co.
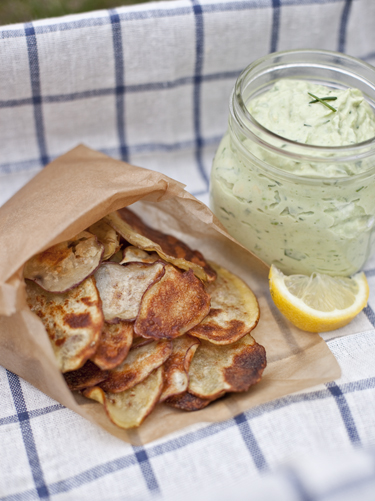
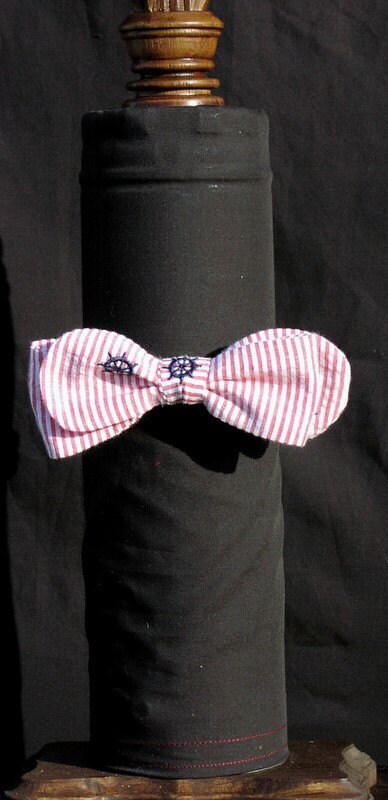
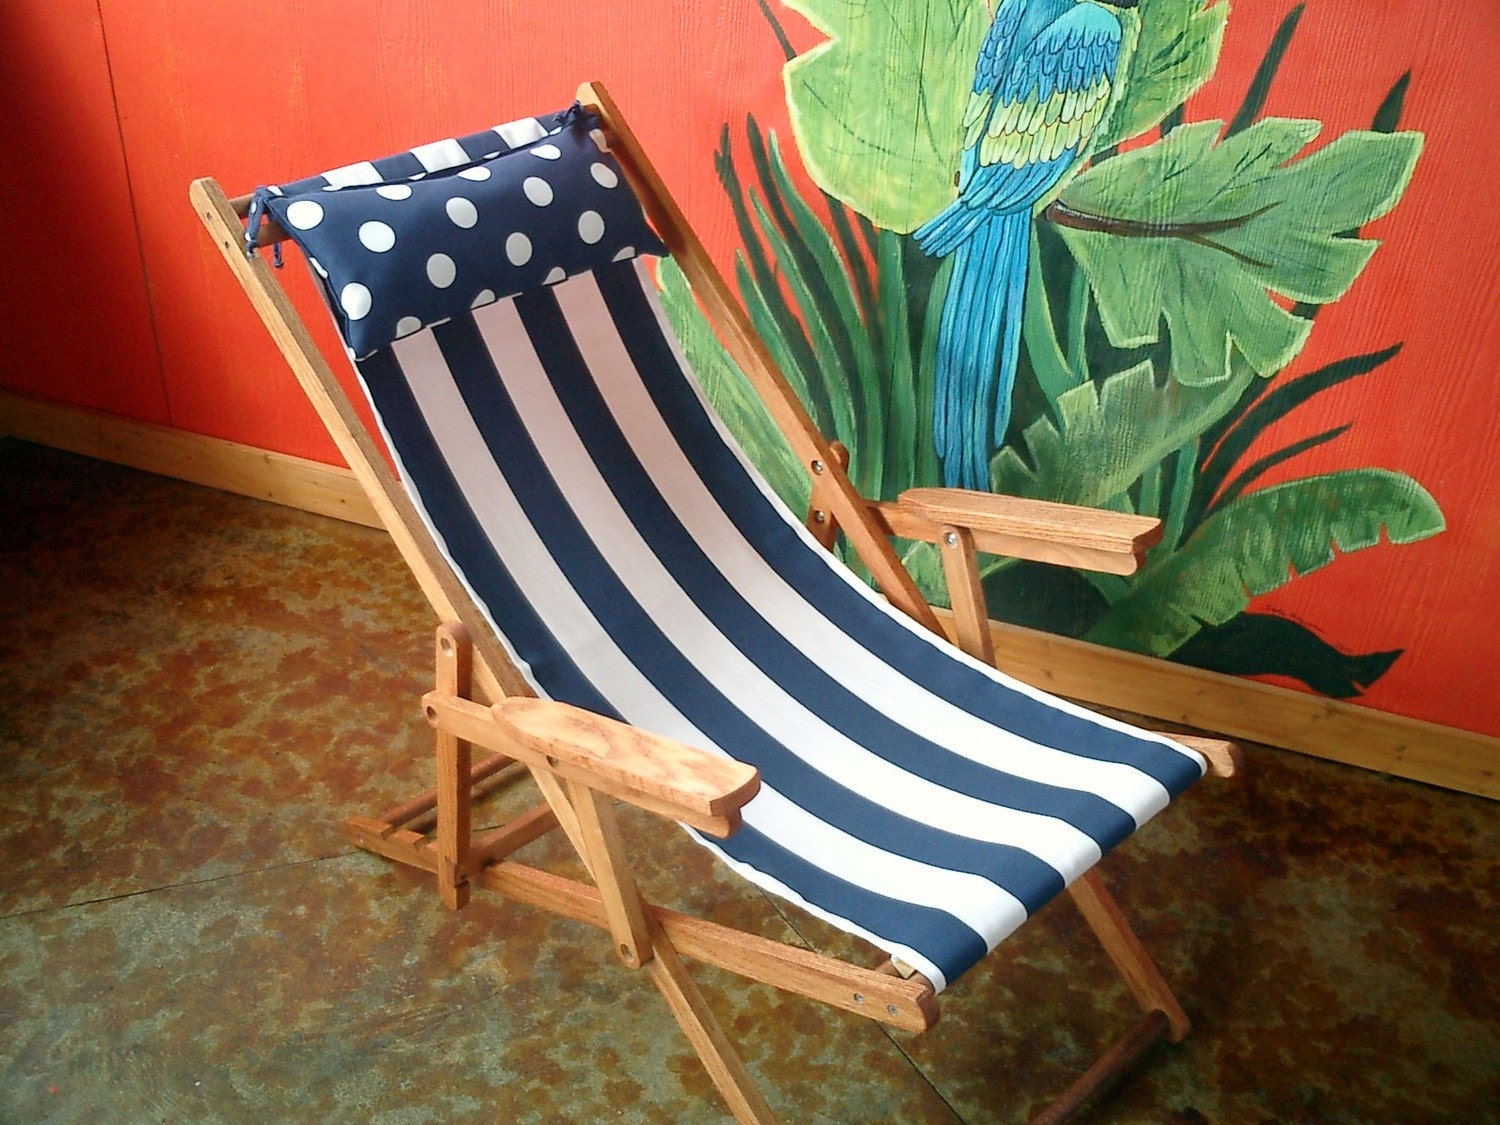
Summer is finally here. I am so lucky that my husband is a teacher and has the summers off with my daughter and I. Now that the weather is finally heated up and staying this way, I am longing to do for a picnic down by the bay.


-A
Category beach chair, bowtie, dresser, nautical, picnic, swim wear, vintage
happy (belated) father's day
0Monday, June 20, 2011 by norelle & co.
We had a pretty exciting weekend around this parts. On Friday, we attended a graduation party for myself, and my two friends, Trevor and Nina, (Norelle even managed to scam two pieces of cake out of us somehow)! Saturday Norelle had her soccer pictures taken, we played at the park, ran through the sprinkler, I worked on my chair makeover while she napped, and then we had a girls night together, since my husband was out at a concert. Sunday, of course, we celebrated Father's Day! We invited my parents and my grandparent's over (my in-laws would have been invited too, but they were away on vacation), for breakfast. I figured I should do something beside's the usual scrambled eggs and bacon, so I prepared a different, but easy special Father's Day breakfast.

We started with a Watermelon and Strawberry Lemonade. Then moved onto the meal; Baked Egg Toasty Cups, which I added a little shredded cheese in the bottom of the cup, before I put the egg in the cups; served them with Herbed Home Fries, Watermelon Feta Salad with mixed greens and easy dressing (3 tbsp balsamic vinegar, 6 tbsp olive oil, 3 tsp honey), and as a special treat, Maple Fresh Toast Bacon Cupcakes.

I saw a recipe online for cupcakes like these, and really wanted to try them out on my husband! I figured that Father's Day would be the perfect time. You can follow the recipe I posted above, but if you feel a little pressed for time, you can do what I did! I bought a box of white cake mix, followed the ingredients on the box, but instead of the oil, I added maple syrup. I also added 1 tsp cinnamon, 1 tsp nutmeg and a 1 tsp of vanilla extract. I followed the directions for the frosting, and viola, maple french toast bacon cupcakes! Although these have bacon in the title, and the whole point is the sweet and salty, I left one cupcake bacon free since I am a vegetarian, but hey, I thought I should be able to try these too!
I also used the cute printable's seen above found on Tatertots & Jello. I hope that everyone had a wonderful weekend celebrating their dad's, stepdad's, grandfather's, greatgrandfather's, uncle's, and any special man in their life!
Happy Father's Day, thank you for all that you do.
-A
Category breakfast, cupcakes, father's day, printables, recipe
in the works
0Friday, June 17, 2011 by norelle & co.
We've been lucky to have had some nice weather around here lately. May seemed to be fairly cold and super rainy, with a few of those hot teaser days in between. June has been wonderful so far, which excites me, since we've had a dresser waiting to be redone in our garage since the end of winter. We are lucky to have a fairly big master suite, with an ensuite bathroom and walk-in closet. I've envisioned having a dresser at the foot of our bed (opposed to the opposite wall where our dressers are on now), but is has proven to be a challenge.
I fell in love with Ikea's Hemnes 8-drawer dresser early on (when the price was higher), and loved its clean line and simplicity.


Category chair, dresser, makeover, paint
congratulations to the class of 2011
0Wednesday, June 15, 2011 by norelle & co.
This past Monday was my graduation from McMaster University, where I received my Bachelor of Arts degree in History. I really did not know what to expect at the ceremony. The only thing I knew is that it would be long, and Steve Smith was our honorary degree recipient. There were a lot of graduands to receive their degree, and the theatre was absolutely packed!! Luckily my husband got into the theatre as soon as the doors opened, and found seats for himself and my parents only 3 rows back from me (since I was in the last row).
Steve Smith is an acclaimed Canadian comedian, who was made especially famous for his character Red Green. His speech was honest and real, which was great to hear; no sugar coating but still funny. There were other speeches, including the Valedictorian and President of the University's. The ceremony started at 2:30 (I had been waiting in a room lined up since 1:00pm... in heels no less), and the ceremony did not end until just after 5:00pm. Wayyyy longer than they expected. The one thing that got me through the ceremony, was sitting only a few feet infront of Ryan Gosling the whole time ;). His mom was graduating with us; he even yelled out, "love you mom! you're the best mom ever!" when she was receiving her degree. He was quite nice "eye candy" if you will, during the long ceremony! I wasn't able to record Steve Smith's speech to our class, nor could I find it online; so I will leave you with one of my favorite and most inspirational of graduation speeches by Baz Luhrmann.
Once again, congratulations to the class of 2011!
-A
Category graduation
diy bunting banner
0Monday, June 13, 2011 by norelle & co.
As explained in my previous post, my daughter just celebrated her 3rd birthday. Besides the homemade tissue paper pom poms and cupcakes, I also made a bunting banner. I love how classic they are, and how they can be used for years to come! First, choose your colour scheme, and choose fabrics accordingly. I chose the cheapest fabrics I could find that matched the colour scheme I was going for at our local fabric store. You can use ribbon or rope to attach your banner triangles together, but I chose quilt edging (especially since it was buy one meter get one free!).


Step 6: Starting at one end of your edging, begining stitching the edging together, continue sewing across all of your triangles, until you get to the opposite end of your edging.

And there you have it, an easy how-to bunting banner! You can add any decals you like to your banner, such as letters, felt shapes, or even rolled fabric flower like I did. Just attatch with hot glue and you're good to go!

As much as I wish time would slow down, and my baby girl wasn't growing so fast, I at least look forward to decorating for all of her birthday parties to come. It will only get even more exciting as she gets older, as she'll has more little friends over for parties and even more fun will ensue!
Cherish the time you have with your wee ones, they grow too fast!
-A
Category bunting banner, fabric, sewing
happy birthday baby girl (DIY Tissue Paper Pom Pom)
1Friday, June 10, 2011 by norelle & co.
I cannot believe how time flies. I remember first finding out I was pregnant, and before we knew it, we had our beautiful, 9lb baby girl in our arms! Our little girl, Norelle, turned three on May 24th. We are so lucky to have amazing friends and family in our lives and we look forward to celebrating her birthday with them every year. I reeeeeally love decorating for her birthdays. For her first birthday, we just went to our local party supplier and bought the typical pink and purple 1's, with the matching decorations, which was easy enough, but didn't quite do anything for my creative side. Last year, we had a butterfly theme (I'll blog about those how-to's another time). This year, we (and by we, I mean me, since my husband would probably just blow up 3 balloons and call that the "decorations") had a red and light blue colour theme. Our house and backyard were filled with home made tissue paper pom-poms, a homemade bunting banner, and a cupcakes galore!


I really love oversized decorations for parties. They really catch your eye and brighten up the space. I made 2 large, and 6 small tissue paper pom-poms for a whopping $2! I bought a red and baby blue package of large tissue paper from our local dollar store, and used floral wire and fishing wire that I had lying around at home for the rest.


Overall, it was a great party. Norelle had a ton of fun blowing bubbles and making a water slide out of her slide in the backyard! Stay tuned for this upcoming Monday's post, where I will give my DIY bunting banner tutorial.
-A
Category bunting banner, cupcakes, party, pom pom

- norelle & co.
- we all have places go to, things to do, and people to see. i am a mom, a forever student, a soon-to-be teacher, an earth sympathizer, and a want-to-be do it yourselfer. this is the way i see life, with all the things i love about it.


