Showing posts with label cupcakes. Show all posts
butterbeer cupcakes
0Friday, July 22, 2011 by norelle & co.
Last weekend was one of my best friend's birthdays, but she pushed back her celebrations since we were away last weekend (talk about feeling special!). I've been trying to think of the perfect cupcake to make for her birthday. I considered doing some fondant, but figured I would run out of time. She loves Harry Potter, Twilight and anything to do with anatomy! Since I figured human organs would make for some weird cupcakes, and our male counterparts would never let us live down making them eat Twilight cupcakes, I figured Harry Potter cupcakes were the best bet.
I have never read the Harry Potter books, nor have I seen any of the movie's past the first, so I had to do a little bit of research. Apparently the drink, "Butterbeer" is quite popular in the books, and has even been created to sell at the Harry Potter theme park. I found a neat and easy recipe on amybites for her Butterbeer cupcakes. Here's how they turned out!


Category butterbeer, cupcake toppers, cupcakes, Harry Potter

Butterfly Cupcakes
0Friday, July 08, 2011 by norelle & co.
On Tuesday, I went out shopping with my mom and N. We ended up in Home Outfitters, browsing around, where my mom found something that she had been telling me that she saw in The Shopping Channel, and almost bought for me. It was the Cupcake Carousel.
Everyone knows that I heart making cupcakes. Finding a good, sturdy, travel container for them is hard to find, especially one that won't wreck the icing and decorations. So as an early anniversary gift, she bought me the Cupcake Carousel.


This makes me think of the Butterfly Cupcakes I made for N's Butterfly themed birthday party. I decorated our backyard by hanging big butterflies on fishing wire, made centerpieces of artificial grass, flower pots with flowers and lanterns.
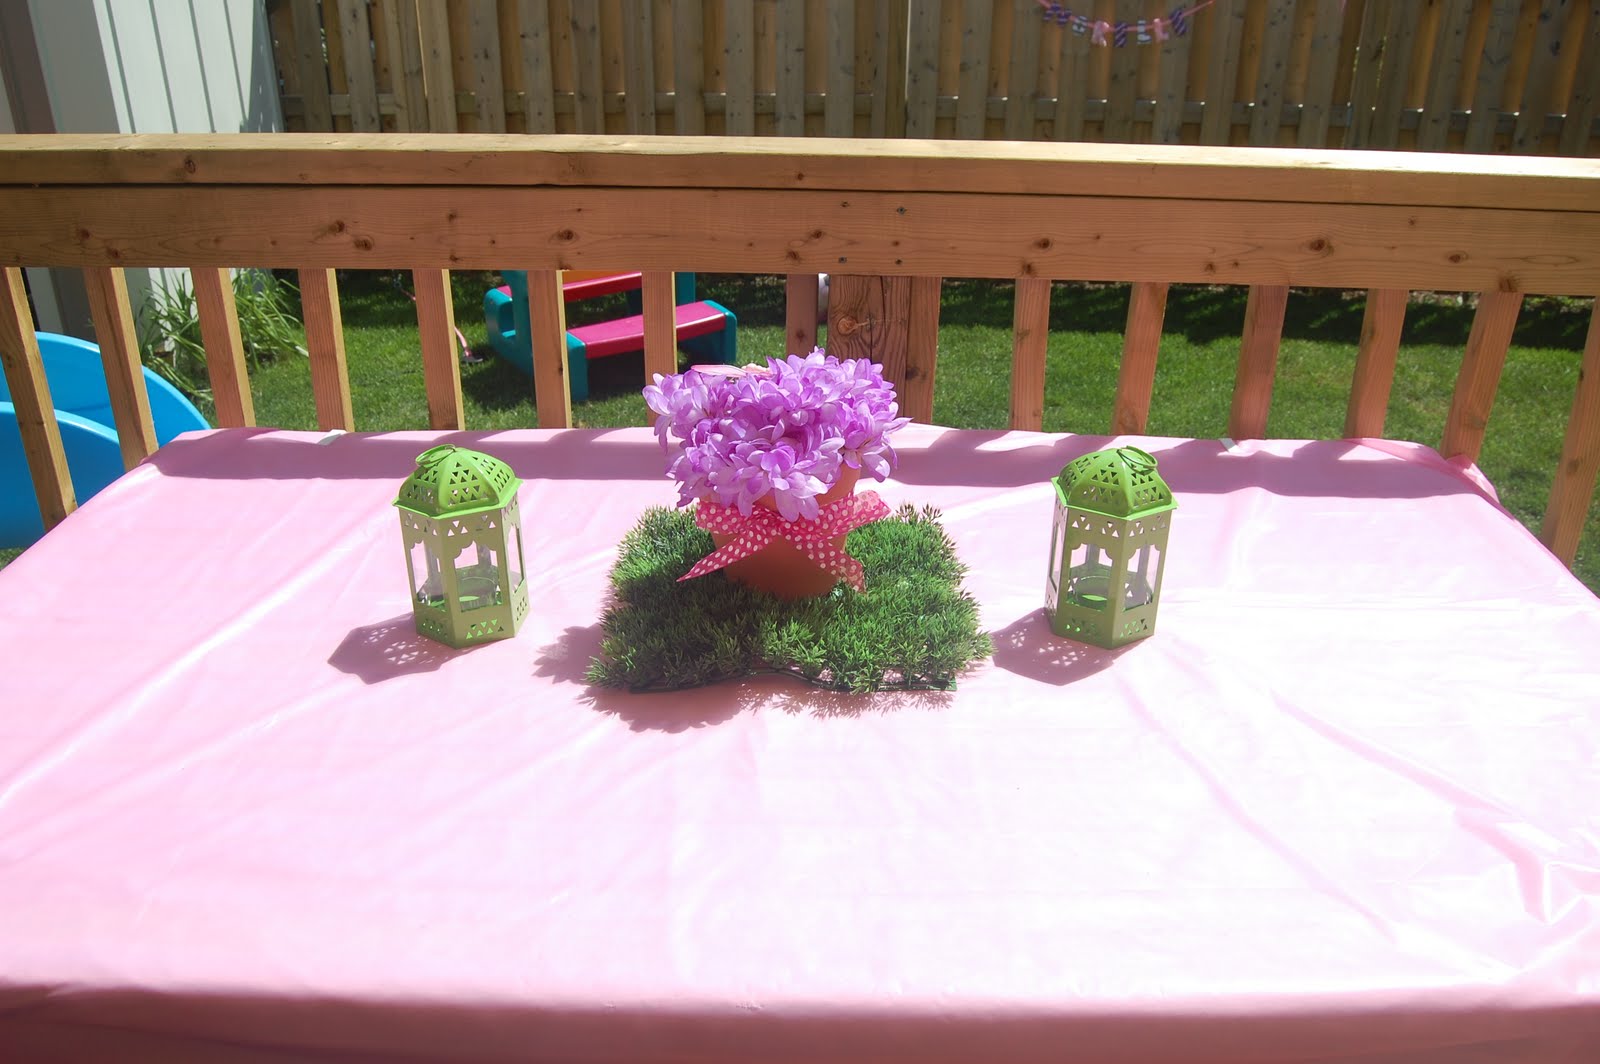

I found the instructions for making these butterflies at Annie's Eats. They were super easy and fun to make (I even made them a couple days in advance and kept them in the fridge to save me some time).
I can't wait to whip up a batch of cupcakes and make a special delivery to someone! Anyone want some cupcakes ;)?!
-A
P.S. How cool is this?!
Category butterflies, cupcakes
happy (belated) father's day
0Monday, June 20, 2011 by norelle & co.
We had a pretty exciting weekend around this parts. On Friday, we attended a graduation party for myself, and my two friends, Trevor and Nina, (Norelle even managed to scam two pieces of cake out of us somehow)! Saturday Norelle had her soccer pictures taken, we played at the park, ran through the sprinkler, I worked on my chair makeover while she napped, and then we had a girls night together, since my husband was out at a concert. Sunday, of course, we celebrated Father's Day! We invited my parents and my grandparent's over (my in-laws would have been invited too, but they were away on vacation), for breakfast. I figured I should do something beside's the usual scrambled eggs and bacon, so I prepared a different, but easy special Father's Day breakfast.

We started with a Watermelon and Strawberry Lemonade. Then moved onto the meal; Baked Egg Toasty Cups, which I added a little shredded cheese in the bottom of the cup, before I put the egg in the cups; served them with Herbed Home Fries, Watermelon Feta Salad with mixed greens and easy dressing (3 tbsp balsamic vinegar, 6 tbsp olive oil, 3 tsp honey), and as a special treat, Maple Fresh Toast Bacon Cupcakes.

I saw a recipe online for cupcakes like these, and really wanted to try them out on my husband! I figured that Father's Day would be the perfect time. You can follow the recipe I posted above, but if you feel a little pressed for time, you can do what I did! I bought a box of white cake mix, followed the ingredients on the box, but instead of the oil, I added maple syrup. I also added 1 tsp cinnamon, 1 tsp nutmeg and a 1 tsp of vanilla extract. I followed the directions for the frosting, and viola, maple french toast bacon cupcakes! Although these have bacon in the title, and the whole point is the sweet and salty, I left one cupcake bacon free since I am a vegetarian, but hey, I thought I should be able to try these too!
I also used the cute printable's seen above found on Tatertots & Jello. I hope that everyone had a wonderful weekend celebrating their dad's, stepdad's, grandfather's, greatgrandfather's, uncle's, and any special man in their life!
Happy Father's Day, thank you for all that you do.
-A
Category breakfast, cupcakes, father's day, printables, recipe
happy birthday baby girl (DIY Tissue Paper Pom Pom)
1Friday, June 10, 2011 by norelle & co.
I cannot believe how time flies. I remember first finding out I was pregnant, and before we knew it, we had our beautiful, 9lb baby girl in our arms! Our little girl, Norelle, turned three on May 24th. We are so lucky to have amazing friends and family in our lives and we look forward to celebrating her birthday with them every year. I reeeeeally love decorating for her birthdays. For her first birthday, we just went to our local party supplier and bought the typical pink and purple 1's, with the matching decorations, which was easy enough, but didn't quite do anything for my creative side. Last year, we had a butterfly theme (I'll blog about those how-to's another time). This year, we (and by we, I mean me, since my husband would probably just blow up 3 balloons and call that the "decorations") had a red and light blue colour theme. Our house and backyard were filled with home made tissue paper pom-poms, a homemade bunting banner, and a cupcakes galore!


I really love oversized decorations for parties. They really catch your eye and brighten up the space. I made 2 large, and 6 small tissue paper pom-poms for a whopping $2! I bought a red and baby blue package of large tissue paper from our local dollar store, and used floral wire and fishing wire that I had lying around at home for the rest.


Overall, it was a great party. Norelle had a ton of fun blowing bubbles and making a water slide out of her slide in the backyard! Stay tuned for this upcoming Monday's post, where I will give my DIY bunting banner tutorial.
-A
Category bunting banner, cupcakes, party, pom pom
- norelle & co.
- we all have places go to, things to do, and people to see. i am a mom, a forever student, a soon-to-be teacher, an earth sympathizer, and a want-to-be do it yourselfer. this is the way i see life, with all the things i love about it.


